


Arduino multitasking - Part Two
When doing projects, it is often the case that you want the processor to do one more thing. But how do you make it do it when it is busy with other tasks?

Man-orchestra, a picture from around 1865, bad Wikimedia.
In this guide, we'll build on the techniques we learned in Section 1.
We will learn how to tame the stopwatch breaks so that everything works like clockwork. We will also discover how to use external interrupts to notify us of external events.
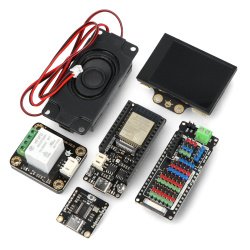
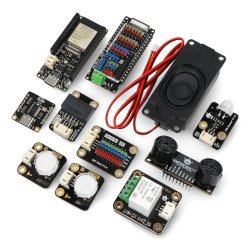
Connecting
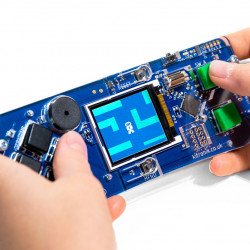
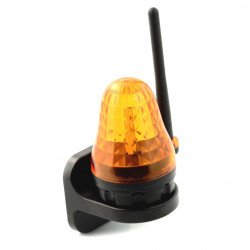
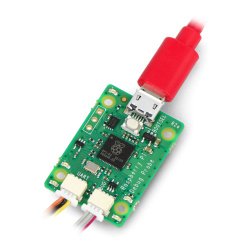
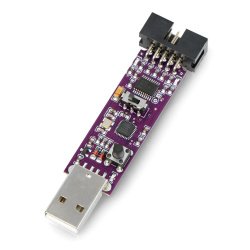
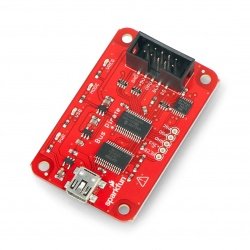
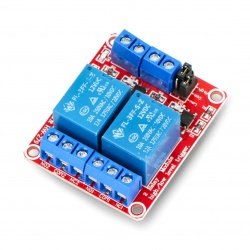
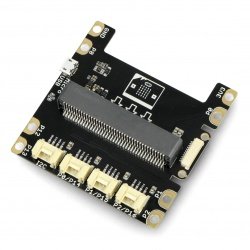
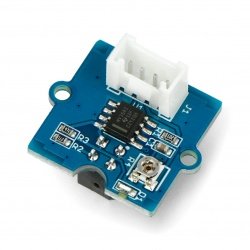
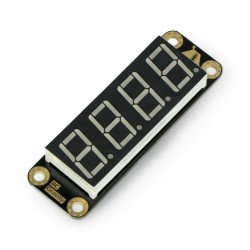
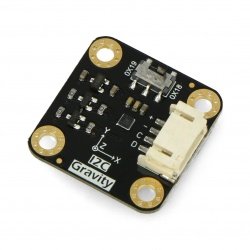
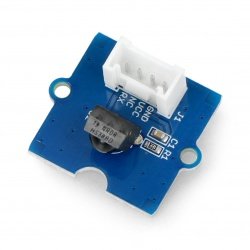
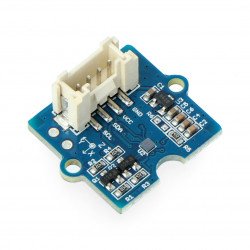
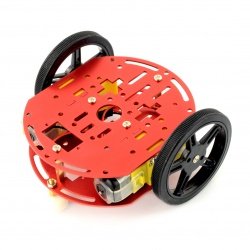
All examples in this guide will use the connection diagram below:

What is an interruption?
An interrupt is a signal that tells the processor to stop everything immediately and deal with high priority processing. It is called Interrupt Handling.
Interrupt handling is another empty function. If you write it and attach it to the interrupt, it will be called every time the interrupt signal is activated. When you disable this function, the processor will resume what it did before.
Where do interruptions come from?
Interruptions can be generated from several sources:
- Time interrupts triggered by Arduino stoppers.
- External interrupts triggered by a change in the status of one of the external interrupt pins.
- Pin change interrupts triggered by a change in the status of any of the pins in the group.
What are they useful for?
Using interrupts makes it no longer necessary to write loops in the code to constantly check the status of high priority interrupts. Thanks to the long running subroutines, you don't have to worry about a slow reaction or forgetting to press a button.
During an interruption, the processor will automatically stop all operations and recall the interrupt operation. All you have to do is write a code that will react to each interruption.
Time interruption

Don't call us, we'll call you
In Part 1, we learned how to use the millis() function in latency. For it to work, we had to call it up after every loop to see if we had to do something. Calling this function more often than every millisecond just to find out that time has not changed was a waste. It would be better if such a check was done only every millisecond.
Stopwatches and time interruptions are what we do. We can set the stopwatch to interrupt us once every millisecond. Then it will tell us when to check the time!
Arduino stoppers
There are 3 types of Arduino Uno stoppers: Stopwatch0, Stopwatch1 and Stopwatch2. The former, is already set to generate a millisecond break that will update the millisecond counter notified by the millis() function. We will also use Stopwatch0.
Frequency and counting
Stopwatches are simple counters that operate at a certain frequency coming from the 16MHz system clock. You can set the clock divider to change frequency and other different counting modes. You can also configure them to create breaks when the stopwatch reaches a certain number.
Stopwatch0 has 8 bits and can count from 0 to 255, and also generates interrupts every time it overflows. By default, it uses a 64 clock divider to provide an interrupt frequency of 976.5625 Hz. We will not change the stopwatch frequency0, as this could change the millis() function!
Comparative Registers
Arduino stopwatches have a number of configuration registers. They can be read or written using special characters specified in Arduino IDE.
We will set the comparison register for Stopwatch0 (this register is known as OCR0A) to generate the next interrupt during counting. Each time you touch, the stopwatch counter is compared with the comparison register, and when they are equal, an interrupt is generated.
The following code will create an interrupt 'TIMER0_COMPA' as soon as the value counter exceeds 0xAF.
// Timer0 is already used for millis() - we'll just interrupt somewhere
 // in the middle and call the 'Compare A' function below
 OCR0A = 0xAF;
 TIMSK0 |= _BV(OCIE0A);
Next, we will specify the interrupt handling for the time interrupt vector known as "TIMER0_COMPA_vect". In this interrupt handling, we will do everything we did in the loop.
// Interrupt is called once a millisecond,
SIGNAL(TIMER0_COMPA_vect)
{
 unsigned long currentMillis = millis();
 sweeper1.Update(currentMillis);

 //if(digitalRead(2) == HIGH)
 {
 sweeper2.Update(currentMillis);
 led1.Update(currentMillis);
 }

 led2.Update(currentMillis);
 led3.Update(currentMillis);
}.
It leaves us with a completely empty loop.
void loop()
{
}
Now you can do anything in your loop. Even use the dealer() function without any consequences! It won't change the operation of the flashersand sweepers.
Source code:
Here's the whole code, including the flashers andsweepers:
#includeclass Flasher
{
// Class Member Variables
// These are initialized at startup
int ledPin; // the number of the LED pin
long OnTime; // milliseconds of on-time
long OffTime; // milliseconds of off-time
// These maintain the current state
int ledState; // ledState used to set the LED
unsigned long previousMillis; // will store last time LED was updated // Constructor - creates a Flasher
// and initializes the member variables and state
public:
Flasher(int pin, long on, long off)
{
ledPin = pin;
pinMode(ledPin, OUTPUT);
OnTime = on;
OffTime = off;
ledState = LOW;
previousMillis = 0;
} void Update(unsigned long currentMillis)
{
if((ledState == HIGH) && (currentMillis - previousMillis >= OnTime))
{
ledState = LOW; // Turn it off
previousMillis = currentMillis; // Remember the time
digitalWrite(ledPin, ledState); // Update the actual LED
}
else if ((ledState == LOW) && (currentMillis - previousMillis >= OffTime))
{
ledState = HIGH; // turn it on
previousMillis = currentMillis; // Remember the time
digitalWrite(ledPin, ledState); // Update the actual LED
}
}
};
class Sweeper
{
Servo servo; // the servo
int pos; // current servo position
int increment; // increment to move for each interval
int updateInterval; // interval between updates
unsigned long lastUpdate; // last update of position public:
Sweeper(int interval)
{
updateInterval = interval;
increment = 1;
}
void Attach(int pin)
{
servo.attach(pin);
}
void Detach()
{
servo.detach();
}
void Update(unsigned long currentMillis)
{
if((currentMillis - lastUpdate) > updateInterval) // time to update
{
lastUpdate = millis();
pos += increment;
servo.write(pos);
if ((pos >= 180) || (pos <= 0)) // end of sweep
{
// reverse direction
increment = -increment;
}
}
}
};
Flasher led1(11, 123, 400);
Flasher led2(12, 350, 350);
Flasher led3(13, 200, 222);
Sweeper sweeper1(25);
Sweeper sweeper2(35);
void setup()
{
sweeper1.Attach(9);
sweeper2.Attach(10);
// Timer0 is already used for millis() - we'll just interrupt somewhere
// in the middle and call the "Compare A" function below
OCR0A = 0xAF;
TIMSK0 |= _BV(OCIE0A);
}
// Interrupt is called once a millisecond, to update the LEDs
// Sweeper2 s not updated if the button on digital 2 is pressed.
SIGNAL(TIMER0_COMPA_vect)
{
unsigned long currentMillis = millis();
sweeper1.Update(currentMillis);
if(digitalRead(2) == HIGH)
{
sweeper2.Update(currentMillis);
led1.Update(currentMillis);
}
led2.Update(currentMillis);
led3.Update(currentMillis);
}
void loop()
{
}
External interruptions
When not using the loop
In contrast to time interruptions, external interruptions are activated by external events. For example, when a button is pressed or when a pulse is received from a rotary encoder. However, you do not have to constantly check whether the GPIO pins need to be changed, as was the case with time interruptions.
Arduino UNO has 2 external interrupt pins. In this example, we connect a button to one of these pins and use them to reset our sweepers. First, we will add "reset()" function to the sweeper class. This function sets the position to 0 and immediately positions the servo there:
void reset()
 {
 pos = 0;
 servo.write(pos);
 increment = abs(increment);
 }
Then we will add a call to AttachInterrupt() to connect the external interrupt to the handling code.
In UNO, Interrupt 0 is linked by a digital pin 2. We will command it to search for the "FALLING" edge of this pin's signal. When the button is pressed, the signal "falls" from HIGH to LOW and the interrupt program "Reset" is called up.
pinMode(2, INPUT_PULLUP);
attachInterrupt(0, Reset, FALLING);
And here's the "Reset" Interrupt Handling Program. It calls up the sweeper reset function:
void Reset()
{
 sweeper1.reset();
 sweeper2.reset();
}
From that moment on, as soon as you press the button, the servo will stop its tasks and start looking for zero position immediately.
Source code:
Here is a complete sketch with stopwatches and external interruptions:
#includeclass Flasher
{
// Class Member Variables
// These are initialized at startup
int ledPin; // the number of the LED pin
long OnTime; // milliseconds of on-time
long OffTime; // milliseconds of off-time
// These maintain the current state
volatile int ledState; // ledState used to set the LED
volatile unsigned long previousMillis; // will store last time LED was updated
// Constructor - creates a Flasher
// and initializes the member variables and state
public:
Flasher(int pin, long on, long off)
{
ledPin = pin;
pinMode(ledPin, OUTPUT);
OnTime = on;
OffTime = off;
ledState = LOW;
previousMillis = 0;
}
void Update(unsigned long currentMillis)
{
if ((ledState == HIGH) && (currentMillis - previousMillis >= OnTime))
{
ledState = LOW; // Turn it off
previousMillis = currentMillis; // Remember the time
digitalWrite(ledPin, ledState); // Update the actual LED
}
else if ((ledState == LOW) && (currentMillis - previousMillis >= OffTime))
{
ledState = HIGH; // turn it on
previousMillis = currentMillis; // Remember the time
digitalWrite(ledPin, ledState); // Update the actual LED
}
}
};
class Sweeper
{
Servo servo; // the servo
int updateInterval; // interval between updates
volatile int pos; // current servo position
volatile unsigned long lastUpdate; // last update of position
volatile int increment; // increment to move for each interval
public:
Sweeper(int interval)
{
updateInterval = interval;
increment = 1;
}
void Attach(int pin)
{
servo.attach(pin);
void Detach()
{
servo.detach();
} void reset()
{
pos = 0;
servo.write(pos);
increment = abs(increment);
}
void Update(unsigned long currentMillis)
{
if ((currentMillis - lastUpdate) > updateInterval) // time to update
{
lastUpdate = currentMillis;
pos += increment;
servo.write(pos);
if ((pos >= 180) || (pos <= 0)) // end of sweep
{
// reverse direction
increment = -increment;
}
}
}
};
Flasher led1(11, 123, 400);
Flasher led2(12, 350, 350);
Flasher led3(13, 200, 222);
Sweeper sweeper1(25);
Sweeper sweeper2(35);
void setup()
{
sweeper1.Attach(9);
sweeper2.Attach(10);
// Timer0 is already used for millis() - we'll just interrupt somewhere
// in the middle and call the "Compare A" function below
OCR0A = 0xAF;
TIMSK0 |= _BV(OCIE0A);
pinMode(2, INPUT_PULLUP); attachInterrupt(0, Reset, FALLING);
}
void Reset()
{
sweeper1.reset();
sweeper2.reset();
}
// Interrupt is called once a millisecond,
SIGNAL(TIMER0_COMPA_vect)
{
unsigned long currentMillis = millis();
sweeper1.Update(currentMillis); //if(digitalRead(2) == HIGH)
{
sweeper2.Update(currentMillis);
led1.Update(currentMillis);
}
led2.Update(currentMillis);
led3.Update(currentMillis);
}
void loop()
{
}.
Libraries
More about stopwatches
Stopwatches can be configured to operate at different frequencies and in different modes. In addition to producing interrupts, they are also used to control PWM pins.
Stopwatch libraries
There are a number of 'timer' libraries from Arduino available on the Internet. Many of them monitor the millis() function and require constant checking as in section 1. But there are also a few that will allow you to configure your stopwatches and generate breaks.
|
TimerOne and TimerThree libraries |
Pin change interruptions
When 2 is not enough
Arduino UNO has only 2 external interruption pins. But what if you need more? Luckily, Arduino UNO helps to break the "pin change" on all pins.
Pin change interrupts are similar to external interrupts. The only difference is that one of them is created for a change in state, on any of the 8 pins connected. They are a little more complicated to handle because you have to follow the last known state of all 8 pins to find out which one caused the interruption.
Stopwatch and interruption label
Breaks are like supermarket checkout lines. Be careful and choose 10 things or less and everything will run smoothly.
If everything is important, nothing is important.
Interruption services should only be used to process the most important, time-sensitive events. Remember that interrupts are disabled in interrupt handling. If you try to do too much on the interruption level, you will degrade the response for other interruptions.
One interruption at a time.
In ISR, interruptions are disabled. This has two very important consequences:
- The work done in the ISR should be short, so that you don't miss any interruptions.
- The code in the ISR should not call up anything that requires interruptions (e.g. the delay() function or anything that uses the I2C bus) in order to work. However, if it does, your program will crash.
Delay long processing for looping
If you need detailed processing in response to an interruption, use the interruption support to do only what is necessary. Set the state variable later to indicate that further processing is required. When calling the update function from the loop, check the status of the variable to see if further processing is required.
Check before reconfiguring the stopwatch
Stopwatches are a limited source. UNO has only 3 of them and they are used for many things. If you change the stopwatch settings, some other things may no longer work. For example, in Arduino UNO:
- Stopwatch0 - used in millis(), micros(), delay() and PWM functions on pins 5 and 6
- Stopwatch1 - used in the WaveHC library and PWM on pins 9 and 10
- Stopwatch2 - used by Tone and PWM on pins 11 and 13
Securely exchange data
We have to be careful when exchanging data between interrupt handling and the code in the loop, because an interruption will suspend any processor operation to continue.
Changing variables
The compiler will sometimes try to optimize your code to speed. Sometimes these changes will stop a copy of the most frequently used variables in the register for quick access. The problem is that some of these variables are shared between the interrupt handling and the loop code. One of them may use an older version instead of the latest. Mark the variables as changing to let the compiler know so that it does not perform these potentially dangerous optimizations.
Protecting larger variables
Even indicating that a variable changesis not sufficient if it is greater than an integer (e.g. subtitles, tables, structures, etc.). Larger variables require several sets of instructions to update themselves. If an interruption occurs during an update, the data may be corrupted. If you have larger variables or structures that are exchanged with interrupt handlers, you should disable interruptions during an update from the loop. (Interrupts are disabled in interrupt handling by default.)
<- part one part three ->
Source: https://learn.adafruit.com/multi-tasking-the-arduino-part-2