


RetroPie - Installation instructions for the Raspbian system emulator
Installation of the RetroPie emulator is very simple and requires only a Raspberry minicomputer and a memory card with the Raspbian system uploaded. Below we present, step by step, the installation process:
Installation of the operating system
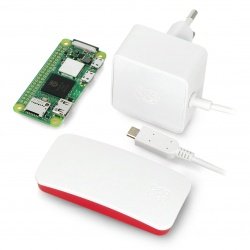
The Raspbian installation guide can be found at this address. The Retro Gaming Kit already comes with an SD card with the NOOBs system previously uploaded, so you only need to select Raspbian as your operating system.
System Update
Before installing the emulator it is recommended to update the system to the latest version with the following commands:
- sudo apt-get update && sudo apt-get upgrade
Local settings
Most installation scripts will attempt to install the packages and libraries that each emulator requires. The installation will not be performed if the local system settings are incorrect. In order to check the settings you have to enter the command in the console:
- locale
After using Raspberry command should return the values set for all options as in the example below:
- LANG=en_US.UTF-8
- LANGUAGE=en_US:en
- LC_CTYPE="en_US.UTF-8"
- LC_NUMERIC="en_US.UTF-8"
- LC_TIME="en_US.UTF-8"
- LC_COLLATE="en_US.UTF-8"
- LC_MESSAGES="en_US.UTF-8"
- LC_PAPER="en_US.UTF-8"
- LC_NAME="en_US.UTF-8"
- LC_ADDRESS="en_US.UTF-8"
- LC_TELEPHONE="en_US.UTF-8"
- LC_MEASUREMENT="en_US.UTF-8"
- LC_IDENTIFICATION="en_US.UTF-8"
- LC_ALL=en_US.UTF-8
If any of the above options is not set, set them with the command:
- update-locale
As in the example:
- sudo update-locale LC_ALL="en_US.UTF-8"
Or through a tool:
- raspi-config
Raspberry needs to be restarted for the changes to be applied by the system.
Installing RetroPie
Once you have configured Raspberry, you must install the packages needed for the installation script using the command:
- sudo apt-get install git lsb-release
Then we download the latest RetroPie installation script:
- cd
- git clone --depth=1 https://github.com/RetroPie/RetroPie-Setup.git
The script is executed using:
- cd RetroPie-Setup
- chmod +x retropie_setup.sh
- sudo ./retropie_setup.sh
If all the steps were executed correctly after the command was executed the following window should appear on the screen:
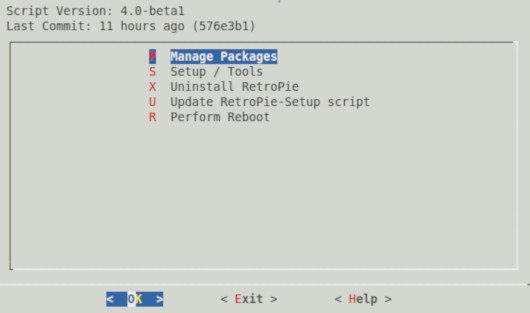
When the window appears, all packages can be installed using the option:
Basic install >> Quick Install
Or install all packages manually using the options:
Manage Packages
In order for the emulator to work properly, you must first install core packages such as:
- RetroArch
- EmulationStation
- RetroPie Menu
- Runcommand
Starting the emulator
After installing the required packages, reset the Rpi. To run the emulator in the console, enter:
- emulationstation
After the first start-up the emulator will require us to configure the controller.
Installation of games
Installation of games is described in detail in the manual prepared by the manufacturer. One of the installation methods is to upload them using an external data carrier. After formatting the media (such as a flash drive) to FAT32 or NTFS. Create on it a folder called retropie, then plug it into the Raspberry and wait until it is finished blinking, after that, connect it to the computer and add the Roms we are interested in to the corresponding subfolders in the retropie/roms folder. After placing the games in the corresponding folders, we connect it back to Rpi and wait until it is blinking again, after that we reset the emulator using the emulation-start option. From this moment on, all games uploaded by us are available in the emulator :)