The contents
Introduction (11)
Acknowledgments (13)
About the book (15)
PART I. GETTING STARTED(19)
Chapter 1. Hello, Arduino (21)
- 1.1. A brief history of the Arduino (22)
- 1.2.The Arduino hardware (23)
- 1.2.1. Arduino Uno (23)
- 1.2.2. Arduino Duemilanove (24)
- 1.2.3. Arduino Ethernet (24)
- 1.2.4. Arduino Mega (25)
- 1.2.5. Other Arduino boards (25)
- 1.2.6. Attack of the clones (27)
- 1.2.7. We start working with the Arduino (28)
- 1.3. Setting up your working environment(28)
- 1.3.1. Software for Arduino (28)
- 1.3.2. Basic hardware setup (29)
- 1.3.3. Your Arduino toolbox(29)
- 1.4. Make somethinghappen! (30)
- 1.4.1. Your first blinking LED(30)
- 1.4.2. Sketch to make an LED blink(30)
- 1.4.3. Connecting everything(31)
- 1.4.4. Uploading and testing (32)
- 1.5. Touring the IDE(33)
- 1.5.1. The maineditor (34)
- 1.5.2.Serial monitor (34)
- 1.5.3. Catching errors(36)
- 1.5.4. Process (36)
- 1.6.Anatomy of a sketch (37)
- 1.6.1.A routine called setup (37)
- 1.6.2. The endlessloop (37)
- 1.7. Commenting code (38)
- 1.8. Summary (39)
Chapter 2. Digital input and output (41)
- 2.1.Getting started (41)
- 2.1.1. Using a breadboard(42)
- 2.1.2. Circuit diagram (42)
- 2.1.3. Adding theLEDs (44)
- 2.1.4. Connecting the hardware(44)
- 2.1.5. Sketch to flash five LEDs(44)
- 2.1.6. Uploadand test (47)
- 2.2.Gaining control (47)
- 2.2.1. Circuit diagram (47)
- 2.2.2. Connections(47)
- 2.2.3. Interrupts butting in(49)
- 2.2.4. Sketch to control the LEDs with a push button(49)
- 2.2.5. Uploadand test (52)
- 2.2.6. Time for a break (52)
- 2.2.7. Uploadand test (53)
- 2.3. Reaction tester(53)
- 2.3.1. Circuitdiagram (53)
- 2.3.2. Connections(53)
- 2.3.3. Sketch to test reaction speed(53)
- 2.3.4. Upload and test (56)
- 2.4. Reactometer: Who really has the fastest reaction time?(56)
- 2.4.1. Sketch to measure reaction speed(57)
- 2.4.2. Upload and test (58)
- 2.5. Summary(58)
Chapter 3. Simple projects: input and output (61)
- 3.1. Time to get analog(62)
- 3.1.1.What’s the difference between analog and digital? (62)
- 3.1.2. Reading a potentiometer (63)
- 3.1.3. Connecting the hardware(64)
- 3.1.4. Sketch to read a potentiometer(64)
- 3.1.5. Upload and test(66)
- 3.2. A piezoelectric transducer (67)
- 3.2.1. The circuit diagram(68)
- 3.2.2. Connecting the hardware(69)
- 3.2.3. Sketch to measure output from a piezoelectric transducer(70)
- 3.2.4. Upload and test (72)
- 3.2.5. Circuit with added speaker(72)
- 3.2.6. Connecting the hardware(72)
- 3.2.7. Sketch to generate a tone(74)
- 3.2.8. Upload and test(74)
- 3.3. Making a pentatonic or five-tone keyboard (75)
- 3.3.1. Circuit diagram(75)
- 3.3.2. Connecting the hardware(75)
- 3.3.3. Sketch to create a pentatonic keyboard (77)
- 3.3.4. Upload and test(78)
- 3.4.Summary (79)
PART II. PUTTING ARDUINO TO WORK(81)
Chapter 4.Extending Arduino (83)
- 4.1. Extending the Arduino with libraries(84)
- 4.2. Core library (84)
- 4.3.Standard libraries (85)
- 4.3.1. Test-driven development with ArduinoTestSuite(85)
- 4.3.2. Storing values using EEPROM(86)
- 4.3.3. Storing more data with SD(87)
- 4.3.4. Get connected with Ethernet(89)
- 4.3.5. Serial communication with Firmata(90)
- 4.3.6. Displaying data using the LiquidCrystal library(91)
- 4.3.7. Controlling a servo motor(92)
- 4.3.8. Turning a stepper motor(92)
- 4.3.9.Communicating with SPI peripherals (93)
- 4.3.10. Communicating with the two-wire interface(95)
- 4.3.11. Get more serial ports with SoftwareSerial(95)
- 4.4.Contributed libraries (98)
- 4.4.1. Installing a new library(98)
- 4.5. Expanding the Arduino with shields(99)
- 4.5.1. Common shields(99)
- 4.5.2. Gotchas: will it work with my Arduino?(102)
- 4.6. Summary(103)
Chapter 5. Arduino in motion (105)
- 5.1. Getting up to speed with DC motors(106)
- 5.1.1. Stopping and starting (107)
- 5.1.2. Sketch to turn a small DC motor on and off(108)
- 5.1.3. Connecting the hardware(108)
- 5.1.4. Upload and test(110)
- 5.2. Speed control and reverse(111)
- 5.2.1. PWM to the rescue (112)
- 5.2.2. The H-bridge for motor control (112)
- 5.2.3. The L293D dual H driver(114)
- 5.2.4. Connecting the hardware(115)
- 5.2.5. Sketch to control a motor with an L293D(116)
- 5.2.6. Upload and test(117)
- 5.2.7. Changing motor speed(117)
- 5.2.8.Upload and test (118)
- 5.3. Stepper motors: one step at a time (119)
- 5.3.1. Unipolar or bipolar(119)
- 5.3.2. Connecting the hardware(122)
- 5.3.3. Stepper motor library functions(123)
- 5.3.4. Sketch to control a stepper motor (125)
- 5.3.5. Upload and test(126)
- 5.4. Try not to get in a flap with servomotors (126)
- 5.4.1. Controlling a servomotor(126)
- 5.4.2. Servomotor functions and methods(127)
- 5.4.3. Sketch to control a servomotor(128)
- 5.4.4. Connecting the hardware(129)
- 5.4.5. Upload and test (129)
- 5.5. Mighty power comes in small packages with brushless DC motors(130)
- 5.5.1. Why no brushes (130)
- 5.5.2. Gaining control (131)
- 5.5.3. Sketch to control a brushless motor(132)
- 5.5.4. Connecting the hardware (134)
- 5.5.5. Upload and test(134)
- 5.5.6. Reverse(135)
- 5.5.7.Sketch to reverse a brushless motor (135)
- 5.5.8. Connecting the hardware(136)
- 5.5.9. Upload and test (136)
- 5.6. The motor control shield for more motors(136)
- 5.7. Summary(137)
Chapter 6. Object detection (139)
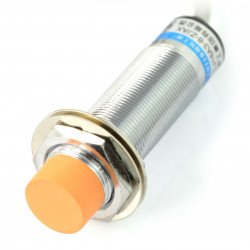
- 6.1. Object detection with ultrasound(139)
- 6.1.1. Choosing an ultrasonic sensor(140)
- 6.1.2. Three wires or four(141)
- 6.1.3. Sketches for ultrasonic object finding (142)
- 6.1.4. Connecting the hardware(144)
- 6.1.5. Upload and test(145)
- 6.2. Infrared for range finding(145)
- 6.2.1. Infrared and ultrasound together(146)
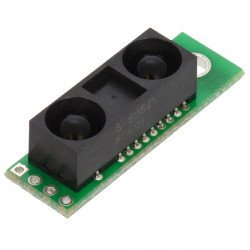
- 6.2.2. The Sharp GP2D12 range finder(146)
- 6.2.3. Nonlinear algorithm for calculating distance (146)
- 6.2.4. Sketch for range finding(147)
- 6.2.5. Connecting the hardware(149)
- 6.2.6. Upload and test (149)
- 6.3. Passive infrared to detect movement(149)
- 6.3.1. Using the Parallax PIR sensor (151)
- 6.3.2. Sketch for infrared motion detection(151)
- 6.3.3. Connecting the hardware(152)
- 6.3.4. Upload and test(153)
- 6.4. Summary(154)
Chapter 7. LCD displays (155)
- 7.1. Introduction to LCDs(156)
- 7.1.1. String variables: String type vs. char type(156)
- 7.2. Parallel character LCDs: the Hitachi HD44780 (158)
- 7.2.1. 4-bit or 8-bit?(159)
- 7.2.2. Library and functions (159)
- 7.2.3. Circuit diagram (159)
- 7.2.4.Connecting everything up in 4-bit mode (160)
- 7.2.5. Sketch for writing to the Hitachi HD44780 (162)
- 7.2.6. Upload and test(163)
- 7.3. Serial LCD weather station(164)
- 7.3.1. Serial vs. parallel LCDs(164)
- 7.3.2. SerLCD library and its functions (165)
- 7.3.3. Temperature sensor Maxim DS18B20 (166)
- 7.3.4. The OneWire and DallasTemperature libraries (167)
- 7.3.5. Circuit diagram(167)
- 7.3.6. Connecting everything up (167)
- 7.3.7. Sketch for an LCD weather station(169)
- 7.3.8. Upload and test(170)
- 7.4.Graphic LCDs: the Samsung KS0108 GLCD (171)
- 7.4.1. Library and functions (171)
- 7.4.2. Circuitdiagram (171)
- 7.4.3. Connecting everything up (172)
- 7.4.4. Sketch for drawing to a GLCD(173)
- 7.4.5. Upload and test(175)
- 7.5. Summary(176)
Chapter 8. Communications (177)
- 8.1. Ethernet (178)
- 8.1.1. The Ethernet Library (179)
- 8.1.2. Ethernet Shield with SD data card(180)
- 8.2. Arduino web server(181)
- 8.2.1. Setting up the server(181)
- 8.2.2. Sketch for creating a web server(182)
- 8.2.3. Upload and test(184)
- 8.2.4. Troubleshooting (184)
- 8.3. Tweet tweet: talking to Twitter(184)
- 8.3.1. Of Twitter and tokens(185)
- 8.3.2. Libraries and functions (185)
- 8.3.3. Circuit diagram and connecting the hardware (185)
- 8.3.4. Sketch for the Twitter button-press tweeter(186)
- 8.3.5. Upload and test(187)
- 8.4. Wi-Fi (188)
- 8.4.1. Arduino Wifi Shield (189)
- 8.4.2. WiFi library and functions(190)
- 8.4.3. Gestures: wireless accelerometers (192)
- 8.4.4. Connecting the hardware(192)
- 8.4.5. Sketch for Bluetooth communication(193)
- 8.4.6. Upload and test(196)
- 8.5. Bluetooth wireless(196)
- 8.5.1. ArduinoBT (196)
- 8.5.2. Adding Bluetooth (198)
- 8.5.3. Establishing a Bluetooth connection(198)
- 8.5.4. Sketch for Bluetooth communication(199)
- 8.6. Serial peripheral interface (SPI)(200)
- 8.6.1. SPI library (200)
- 8.6.2. SPI devices and digital potentiometers(201)
- 8.6.3. Circuit diagram and connecting the hardware(202)
- 8.6.4. Sketch for a digital LED dimmer(203)
- 8.7. Data logging(204)
- 8.7.1. Types of memory (205)
- 8.7.2. SD cards and the SD library (205)
- 8.7.3. Sketch for an SD card sensor logger(206)
- 8.8. Xively (207)
- 8.8.1. Sign up for an account and get an API key(208)
- 8.8.2. Creating a new data feed(208)
- 8.8.3. Sketch for Xivelysensor logging(209)
- 8.8.4. Upload and test(211)
- 8.9. Summary(212)
Chapter 9. Game on(213)
- 9.1. Nintendo Wii salutes you(213)
- 9.1.1. Wii Nunchuk (214)
- 9.1.2. Nunchuk connections (216)
- 9.1.3. Wii will talk (218)
- 9.1.4. Wii will test(226)
- 9.2. Release the Xbox (227)
- 9.2.1. Getting connected (228)
- 9.2.2. USB Host library(229)
- 9.2.3. Learning about the Xbox controller using the USB Host Shield(229)
- 9.2.4.Xbox reporting for duty (231)
- 9.2.5. Let’s boot it (233)
- 9.2.6. Interfacing with code(233)
- 9.2.7. Xboxhid.Ino (235)
- 9.2.8. Hardware connections and testing(239)
- 9.3. Summary (239)
Chapter 10. Integrating the Arduino with iOS(241)
- 10.1. Connecting your device to the Arduino(243)
- 10.1.1. The Redpark serial cable (243)
- 10.1.2. The final connection (244)
- 10.2. iOS code(245)
- 10.2.1. Creating a single-view application in Xcode(245)
- 10.2.2. Writing the code(250)
- 10.3. The Arduino gets involved(253)
- 10.3.1. Sketch to switch LED from iOS device(253)
- 10.3.2. Testing the sketch(254)
- 10.4. Doing more with Xcode(255)
- 10.4.1. Adding a Slider control (255)
- 10.5. Arduino sliding(259)
- 10.5.1. Arduino slider circuit(260)
- 10.5.2. Testing the circuit(261)
- 10.6. Moving data to the iOS device(262)
- 10.6.1. Xcode coding(262)
- 10.6.2. The GP2D12 IR distance sensor(265)
- 10.6.3. Testing(267)
- 10.7. Summary(267)
Chapter 11. Electronic gadgets (269)
- 11.1. Introducing the LilyPad(270)
- 11.1.1. LilyPad Accessories (271)
- 11.1.2. Conductive thread and fabric (272)
- 11.2. Creating a turn-signal jacket(274)
- 11.3. Creating a wearable piano (276)
- 11.4. The Arduino Pro Mini (279)
- 11.5. Creating a smart headphone(280)
- 11.6. Creating a jacket with a compass(282)
- 11.7.Summary (286)
Chapter 12. Adding shields(287)
- 12.1. Shield basics(287)
- 12.2. The Adafruit motor shield(288)
- 12.2.1. The AFMotor Library (289)
- 12.2.2. Using the motor shield with a stepper motor(290)
- 12.2.3. Using the motor shield with a DC motor(292)
- 12.2.4. Getting a motor shield(294)
- 12.3. Creating your own shield(295)
- 12.3.1. Memory (295)
- 12.3.2. Level shifters(296)
- 12.3.3. The SD card holder(296)
- 12.3.4. Connecting the SD card to the Arduino(297)
- 12.3.5. Preparing the perfboard(299)
- 12.3.6. Testing the shield(302)
- 12.4. Summary(303)
Chapter 13. Software integration(305)
- 13.1. The serial channel(306)
- 13.2. Servos for face tracking(307)
- 13.2.1. Assembling the face-tracking hardware(308)
- 13.2.2. Code for face tracking (309)
- 13.3. Using Firmata to create an equalizer(313)
- 13.3.1. Using Firmata in your application(314)
- 13.3.2. Audio analysis in Processing(315)
- 13.3.3. Assembling the equalizer hardware(315)
- 13.3.4. Code for theequalizer (316)
- 13.4. Using Pure Data to create a synthesizer(319)
- 13.4.1. Assembling the synthesizer hardware(320)
- 13.4.2. Code for the synthesizer(320)
- 13.5. Using Python to monitor temperatures(324)
- 13.5.1. The Serial library in Python (324)
- 13.5.2. Assembling the thermometer hardware(325)
- 13.5.3. Code for monitoring temperature (326)
- 13.6. Summary (328)
Appendix A. Installing the Arduino IDE(329)
- A. 1. Windows (329)
- A. 1.1. Installing drivers for the Arduino (329)
- A. 2. Mac OS X (332)
- A. 3. Linux (333)
Appendix B. Coding primer(337)
- B. 1. The history of the language of Arduino (337)
- B. 2. Variables (338)
- B. 2.1. Types of variables (339)
- B. 2.2. Arrays (340)
- B. 2.3. Sign sequences (341)
- B. 2.4. Constants (341)
- B. 2.5. Range of variables (342)
- B. 3. Taking Control (343)
- B. 3.1. Commands: If, else, else if (344)
- B. 3.2. User manual switch-case (346)
- B. 3.3. Logical operators (347)
- B. 4. Loop (348)
- B. 4.1. The for loop (348)
- B. 4.2. While loop (349)
- B. 4.3. Do while loop (350)
- B. 5. Functions (350)
- B. 6. Summary (351)
Appendix C. Libraries (353)
- C. 1. Anatomy of library (353)
- C. 1.1. File .h (header) (353)
- C. 1.2. File .cpp (354)
- C. 2. Using the library (355)
- C. 2.1. Using the library in the sketch (355)
- C. 2.2. Distribute the library (356)
Appendix D. Components list(357)
Appendix E. Useful links (361)
Index (363)
|